Archive for the ‘Howto’ Category
Connect to WPA2 wifi from Linux server
If you have a terminal-only, no-GUI linux server that you need to connect to a WPA2 PSK network, here’s what you need to add to /etc/network/interfaces:
auto wlan0

iface wlan0 inet dhcp

wpa-ssid {myssid}

wpa-psk {mywpapsk}

dns-nameservers 8.8.8.8
To calculate your 256-bit WPA PSK from your ASCII passphrase, run the following command:
wpa_passphrase ssid passphrase
Be warned, the result is 32 characters long.
Migrating from one Google account to another
Here’s the steps I followed and difficulties I recently encountered while migrating from one Google account to another:
Emails
You need to enable POP3 on the source account and then have the target account import them. This can take several hours days if (like me) you have accumulated many thousands of emails over several years. It will import all past email and then continue to import email arriving at the source account in the future.
One issue is that you lose the labels structure you had assigned to emails in the source Gmail account.
If you have enabled 2-step authentication on the source account (as you should), you’ll need to create an “application specific password” to give to the target Gmail account.
You’ll then have to change all your newsletter and mailing list subscriptions to point to the new address, and let all your contacts know that they should from now on contact you at your new address.
Contacts
This one is totally straightforward; you export to a CSV file and import on the new account. All info is maintained, including groups.
Calendars
Export all calendars into a ZIP file containing one iCal file per calendar. Create calendars on target account, import iCal files one-by one.
If you shared any of them with other users, you’ll need to share them again; in that case, tell the other users to remove the old instance of each shared calendar, otherwise they’ll see duplicate events.
If other users shared calendars with you, they’ll need to share them again.
Drive
Unfortunately, the only way seems to be to download everything, and then upload it again on the target account.
Google+
Profile: you’ll need to re-introduce this.
Photos: use Google Takeout to download them, then upload them again
Circles/People: Use Google Takeout, as described here
Posts: I haven’t found a way to migrate those.
Maps
Re-introduce your starred places manually.
Youtube
Video Uploads: if you no longer have the originals, download each from Video Manager. Then upload each video anew.
Subscriptions: there seems to be no way to export your subscriptions. Just subscribe again, one-by-one.
Playlists, liked/favourite videos: Lists have to be public or unlisted, not private. Share them with yourself via email, then save them in your new profile.
Chrome Sync
Just sign out of the old account and sign into the new one. Bookmarks, passwords etc will remain in the browser when you sign out of the old account, and will then be imported into the new account when you sign into it.
Play Store
It is not possible to transfer purchased apps to another account.
Keep
You’ll need to reintroduce each note. You can email to yourself the larger ones
Installing Epson Stylus SX424W under Linux
Out of the box, if you tell Ubuntu to add a network printer, it will find it (give it 5-10 seconds to search) and recognise its make and model. However, if you press proceed, it will get stuck searching for the driver.
The solution is to go to download.ebz.epson.net/dsc/search/01/search/?OSC=LX and search not for SX424W, but for SX420. Then download the correct driver for your system (.rpm or .deb, x86 or x64) and install it. There’s one driver for the printer and another one for the scanner.
After that, repeat the “add network printer” wizard.
Rotate videos from the command line
To rotate a video from the command line, use avconv (contained in the libav-tools package), which used to be called ffmpeg.
For a single file, type:
avconv -i original.mp4 -vf "transpose=1" rotated.mp4
Nagios
Here’s how you can set up a Nagios server in order to monitor a publicly accessible website and get an email notification when it’s down.
On the monitoring server:
- sudo apt-get install nagios3
- choose password for user nagiosadmin
- access Nagios at http://<servername>/nagios3
Now create a .cfg file under /etc/nagios3/conf.d with the following contents:
define host {
        use             generic-host
        host_name       xxx
        alias           xxx
        address         xxx
        }
define service {
        use             generic-service
        host_name       xxx
        service_description     HTTP
        check_command   check_http
        }
(replace all instances of xxx with the appropriate values)
Now restart Nagios: sudo service nagios3 restart
Any notifications will be emailed to root@localhost
References:
How to install request tracker in Ubuntu
- sudo apt-get install request-tracker4 rt4-db-mysql rt4-apache2 libapache2-mod-fcgid
- sudo cp /etc/request-tracker4/apache2-fcgid.conf /etc/apache2/sites-available/rt4
- sudo a2ensite rt4; sudo service apache2 restart
To edit RT’s configuration, don’t edit directly the file /etc/request-tracker4/RT_SiteConfig.pm. Instead, change the files (or add one) under /etc/request-tracker4/RT_SiteConfig.d/*, then run sudo update-rt-siteconfig
Submenus in Drupal with Superfish
If your Drupal theme does not support submenus, you will not see them even if you add them to your menu, enable them and activate the “show as expanded” option on the parent menu item.
The solution is Superfish (based on the jQuery Superfish plugin). In order to install it in Drupal, do the following:
- go to the root of your Drupal installation, download and install the Libraries module: drush dl libraries && drush en libraries
- go to sites/all/libraries and download the Superfish-for-Drupal library: git clone https://github.com/mehrpadin/Superfish-for-Drupal superfish
- go to sites/all/modules, download and extract the Superfish module: curl http://ftp.drupal.org/files/projects/superfish-7.x-1.9-beta5.tar.gz | tar zxv
- enable the Superfish module: drush en superfish
Now go to your Drupal administration interface, find Superfish under modules and configure the number of menu blocks you want it to add. I set it to one as that’s all I need.
Then, go to Structure – Blocks, disable the Main Menu, enable your Superfish menu and click on “configure” next to it, then set its title to <none> and menu parent as the main menu.
drush
A very useful command-line tool for Drupal is Drush
I use it to update Drupal modules, themes and the Drupal core, plus it automatically does backups before each operation, and database upgrades when needed afterwards.
Here’s how to install drush:
sudo apt-get install php-pear
sudo pear channel-discover pear.drush.org
sudo pear install drush/drush
Then to update a given module, cd to the base of your Drupal installation and run
sudo drush up <module name>
IRC with Empathy on Ubuntu
If you want to chat on IRC using the Empathy client in Ubuntu, you need to install the following two packages: telepathy-idle account-plugin-irc
For more info: https://help.ubuntu.com/community/InternetRelayChat
Free your Android
Here is a step-by-step guide to install CyanogenMod (CM) 10.1 on your Galaxy SIII (i9300) from a Ubuntu 12.10 amd64 system. It adds some clarifications and some additional advice to the official guide on cyanogenmod.org.
It’s best to have a microSD card where you can put the image files and perform backups.
Downloads
Before you start messing with your phone, download all the tools and images you need:
- the Heimdall tool and the ClockworkMod Recovery .img file (CWM) that corresponds to your phone
- the CM prebuilt release of your choice (.zip); I went with the latest CM 10.1 Nightly in order to have all the latest features
- optional: the non-FOSS Google apps (Play Store, Maps, etc), as they are not included in the stock CyanogenMod ROM
Now put the CM and Google Apps images onto the microSD and plug it into your phone.
ClockworkMod Recovery
In this section you will replace Android’s default recovery mode with the ClockworkMod one, which has some additional features
To enter Download Mode, shut down your Galaxy and then press simultaneously the Power, Home and Volume Down buttons for 2-3 seconds; at the warning, press Volume Up to continue
- put your phone into Download Mode
- connect the phone via USB cable to your PC
- in a terminal on your PC, run:
sudo heimdall flash --recovery <recovery file> --no-reboot
The heimdall tool should install the CWM recovery on your phone and then wait. If a blue progress bar appeared on your phone, proceed to the next section. Do not reboot your phone yet.
Install CyanogenMod
In this section you will backup your phone, wipe it and install CyanogenMod (CM) and the Google Apps.
To enter Recovery Mode, shut down your Galaxy and then press simultaneously the Power, Home and Volume Up buttons until you see the “Samsung Galaxy S III” logo; then release the Power button while still pressing the Home and Volume Up buttons
- reboot the phone into Recovery Mode (Attention! Don’t let your phone boot normally, or you’ll need to re-install CWM)
- move up and down in the menu with the volume keys and make a choice with the power button
- before you do anything else, perform a backup; it will backup your /boot, /recovery, /system, /data and /cache
- wipe the /data and /cache partitions
- choose “Install zip from sdcard”, then “choose zip from external sdcard” and choose first the CM image, then the Google Apps image
- reboot your phone by choosing “+++++Go Back+++++” and then “reboot system now”
Your phone should boot into the new operating system.
If you see the CyanogenMod logo rotate for more than 5′, something is wrong. Repeat the above steps
Once you connect with your Google account and open the Play Store, it should start downloading all the apps you had on Android. However, you will need to add all accounts once again.
Now that you have rooted your phone, you might want to install SuperUser and Rom Manager.
-

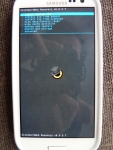
- Download Mode
-

- Android Recovery Mode
-
- ClockworkMod Recovery Mode
-

- CyanogenMod Boot Logo
